Okay, imagine this: I'm at a work presentation, PowerPoint is struggling (as usual), and the boss is demanding exact numbers, right now. I, naturally, panic-sweat and have to dive into Excel. But where is that darn menu I need? It's like Excel is playing hide-and-seek... again! It’s always in the most unexpected place. Like, why couldn't it just be... centered?
That's right! Today we're talking about centering menus (or specific bits of data) in Excel. Specifically, how to make that happen so you don’t end up looking like you're wrestling a spreadsheet during a crucial moment. Been there, done that, got the awkward t-shirt.
Why Center in Excel, Anyway?
Besides avoiding presentation-induced meltdowns, why bother centering things? Well:
- Readability: A centered title or a strategically placed menu (if that were possible, nudge nudge, wink wink) can really draw the eye and make the document easier to navigate.
- Aesthetics: Let's be honest, a little symmetry never hurt anyone. A well-centered element just looks more professional.
- Emphasis: Centering something makes it stand out. It's like putting a spotlight on the important stuff. Think of it as the Excel equivalent of a drumroll!
So, About That Centering…
Okay, so Excel doesn’t exactly let you drag and drop the whole menu bar to the middle of the screen. Sorry to disappoint if that's what you were hoping for! But don't despair! There are a few things you can do to achieve that visual balance we're after.
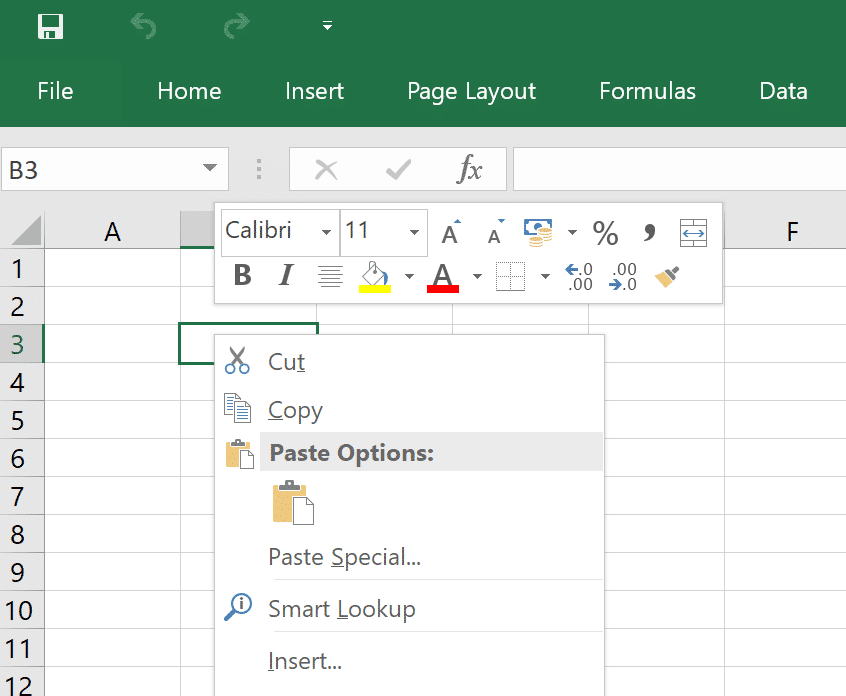
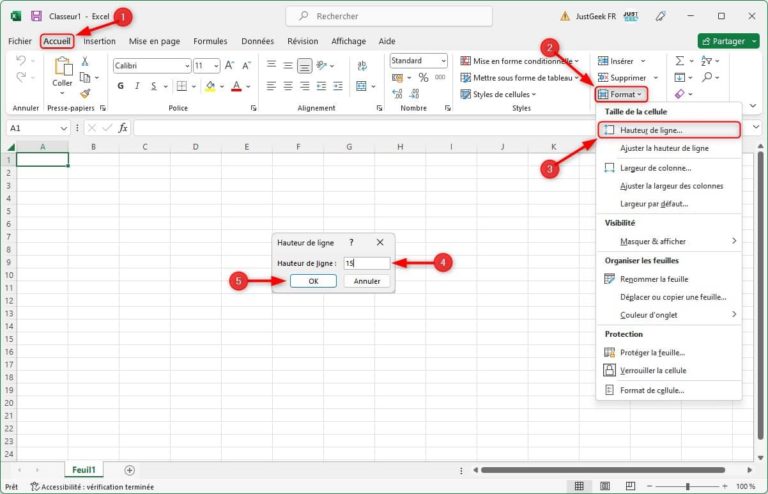
Centering Data within Cells: This is the classic move, and probably what you were thinking of. Select the cells you want to center, then:
- Go to the "Home" tab.
- In the "Alignment" group, click the "Center" button (it looks like a horizontal line with lines on either side). Ta-da! Centered text!
You can also center vertically within a cell, using the buttons above and below the horizontal center alignment button. It’s all about playing around and finding what looks best!
Merging Cells for a Title:
Want a title that stretches across your entire spreadsheet? Merge and Center is your friend!
- Select the cells you want to merge into one big title cell (e.g., A1 to G1).
- Click the "Merge & Center" button in the "Alignment" group (it might be a dropdown, choose "Merge & Center" from the list).
- Type your title into the newly merged cell. Boom! Title right in the middle.
Caution: Merging cells can sometimes mess with formulas and data structures, so use it wisely! Especially if you're doing some fancy stuff with lookups or calculations.
"Centering" Other Elements (A Bit of a Hack):
Okay, this is more of a workaround than a true "center the menu" solution, but you can strategically place images or charts near the center of your visible sheet area to give the impression of a more balanced layout. It's all about tricking the eye!

For instance, put a logo, a small chart, or even a formatted text box near the vertical center of your visible rows. It can create a visual anchor that makes the whole thing feel less… chaotic. Hey, visual trickery is part of the Excel artist's toolkit, right?
So, while we can't literally drag the main Excel menu bar to the middle of the screen (yet! Maybe someday, Excel Gods!), these tricks can help you create more visually appealing and easily digestible spreadsheets. Happy centering!
![[Power Query] garder la mise en forme excel apres actualisation des](https://www.developpez.net/forums/attachments/p626619d1664831512/logiciels/microsoft-office/excel/power/power-query-garder-mise-forme-excel-apres-actualisation-donnees/conserverformatdescellules.png/)