Okay, picture this: last summer, heatwave central. The power grid was groaning louder than my grandpa after Sunday lunch. My neighbor, bless his cotton socks, decided it was the perfect time to weld his vintage tractor. Boom! Power outage. And guess who was stuck with melted ice cream? Yup, yours truly. That's when I started looking into power management, specifically délesteurs. Because, let's be honest, nobody wants melted ice cream.
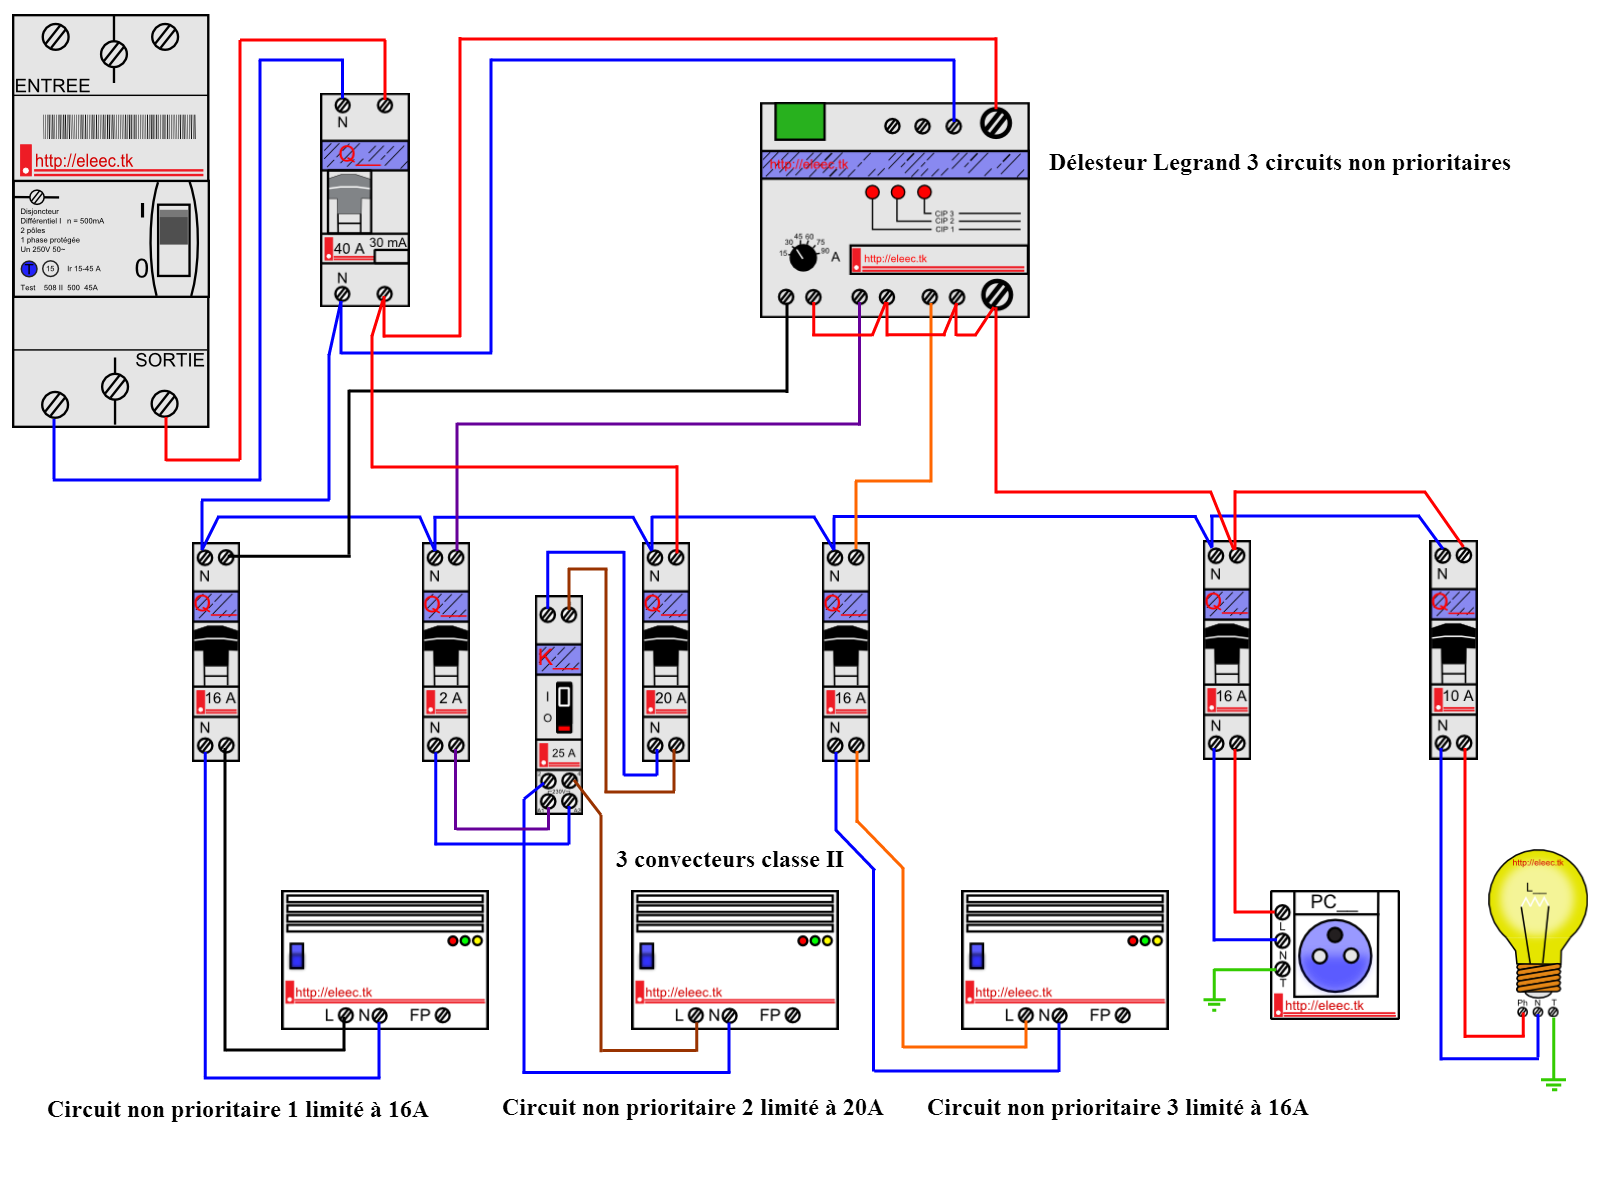
Today, we're diving into the wonderful world of wiring a triphasé (three-phase) load shedding device (aka délesteur). Don't run away screaming! It sounds complicated, but with a little patience and a multimeter, you'll be shedding loads like a pro in no time. Think of it as your personal power grid referee. (Except, hopefully, less controversial than a real referee.)
What Exactly IS a Délesteur Triphasé?
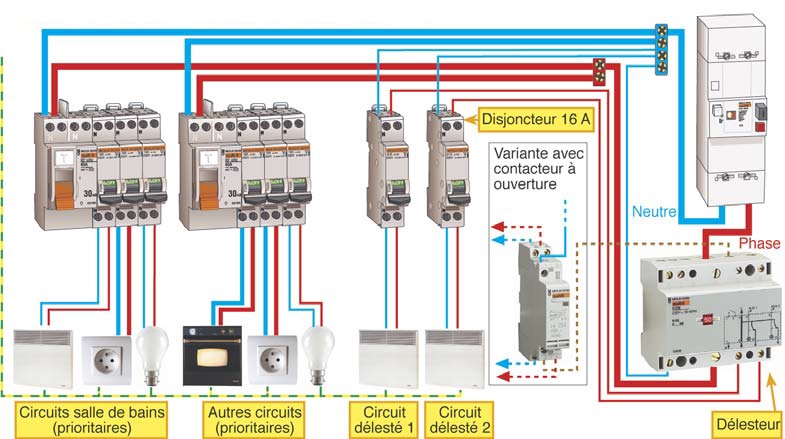
In simple terms, a délesteur monitors your power consumption. When it detects that you're nearing your maximum allowed power, it automatically disconnects less important appliances to prevent a power overload. It's like telling your kids, "Okay, gaming console off, dishwasher on hold - mom needs to dry her hair!" - except it does it automatically and without the yelling. (Wouldn't that be nice in real life too?)
The "triphasé" part just means it's designed for three-phase electrical systems, commonly found in larger homes or businesses where heavier loads are expected (like, say, welding vintage tractors... ahem...).
Wiring: The Nitty-Gritty
Alright, let's get down to the brass tacks. Disclaimer: I'm not a qualified electrician. If you're uncomfortable working with electricity, please, please, PLEASE call a professional. Safety first! Nobody wants to become a human circuit breaker.
Here’s a simplified overview of the wiring process:
- Turn off the power! Seriously, do it. Double-check. Maybe even triple-check. Consider sending a text to your electrician friend just to make sure. Better safe than sorry!
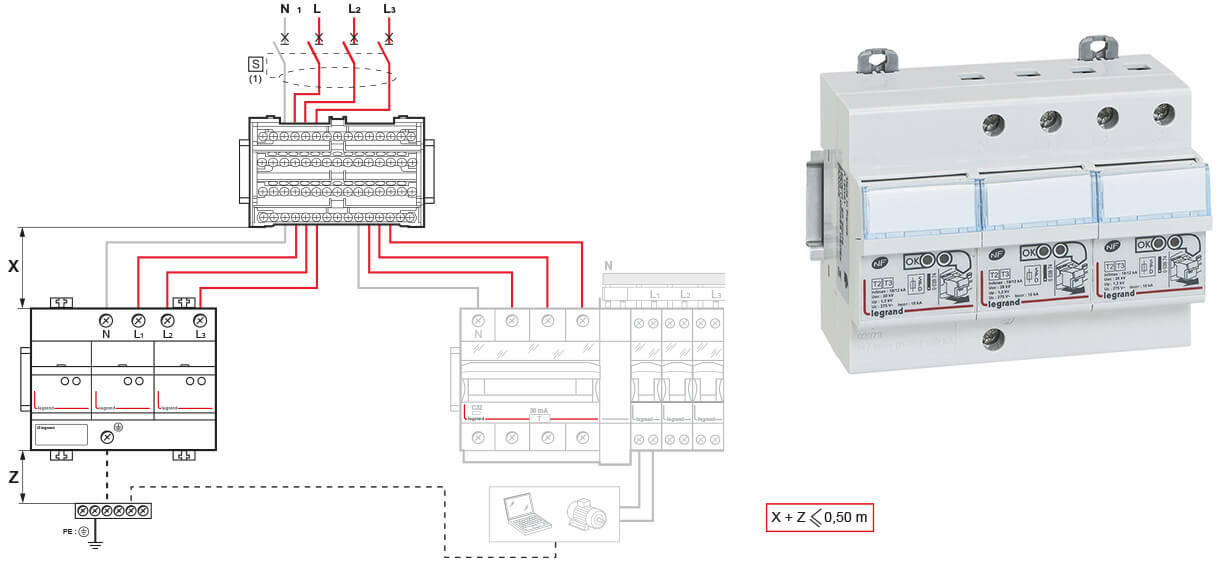
- Identify your phases (L1, L2, L3) and Neutral (N). These will be clearly marked on your electrical panel.
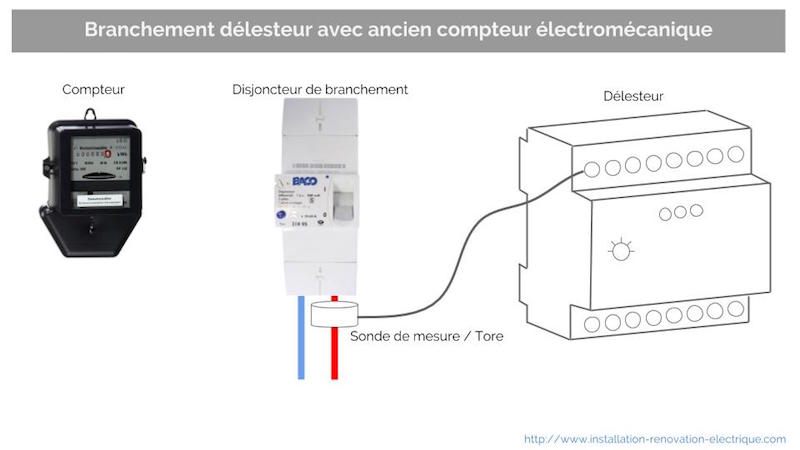
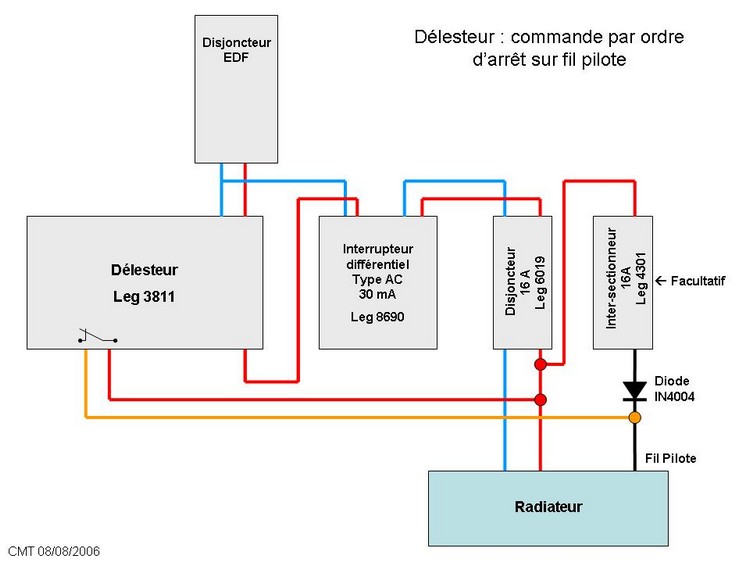
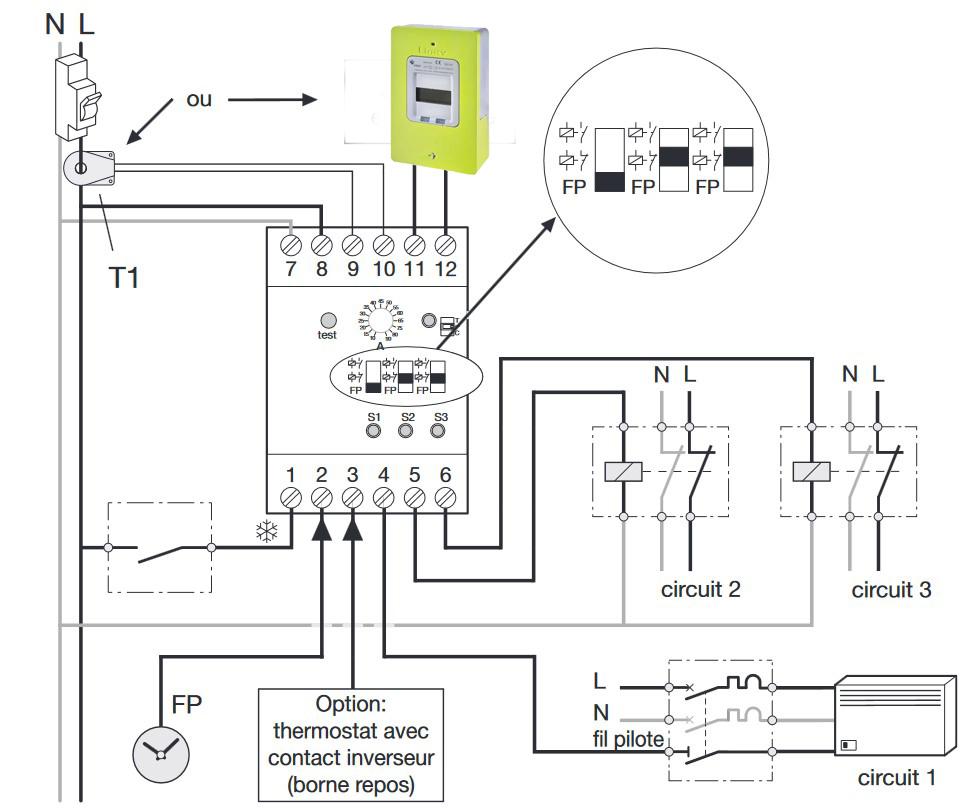
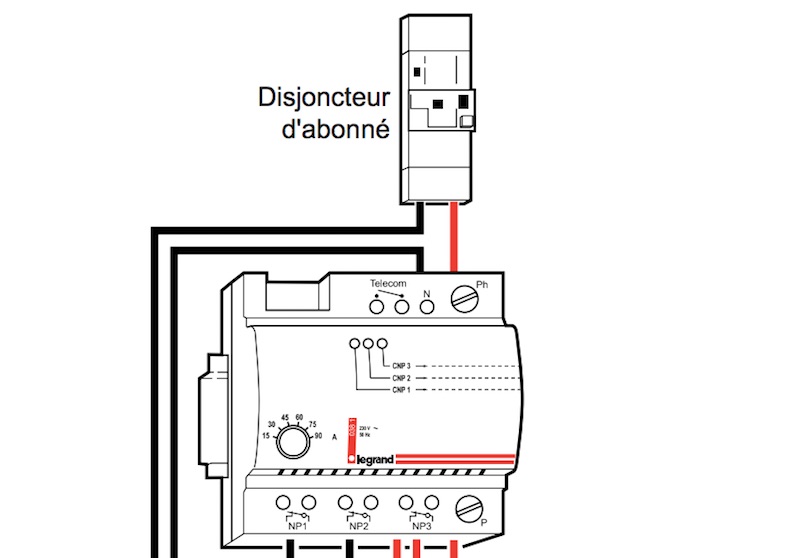
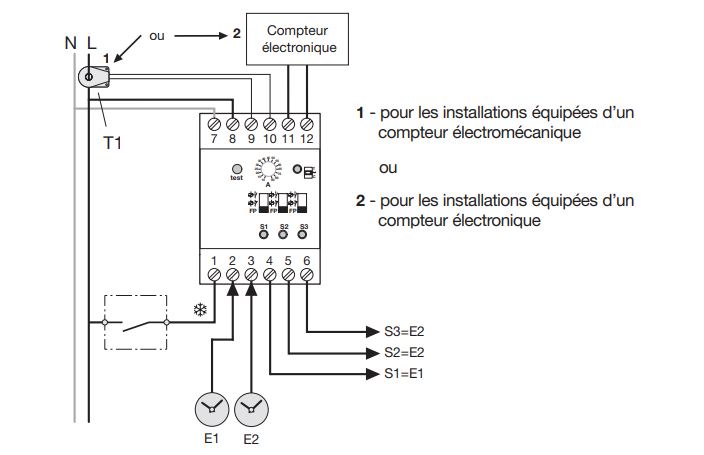
- Connect the délesteur's power supply. This usually involves connecting the three phases and neutral to the corresponding terminals on the délesteur. Refer to the device's manual - it's your bible here!
- Connect the current transformers (CTs). These clamp around each phase wire to measure the current flowing through them. The CTs then connect to the délesteur. Important: Make sure the CTs are oriented correctly, following the manufacturer's instructions. An incorrectly oriented CT can give you inaccurate readings.
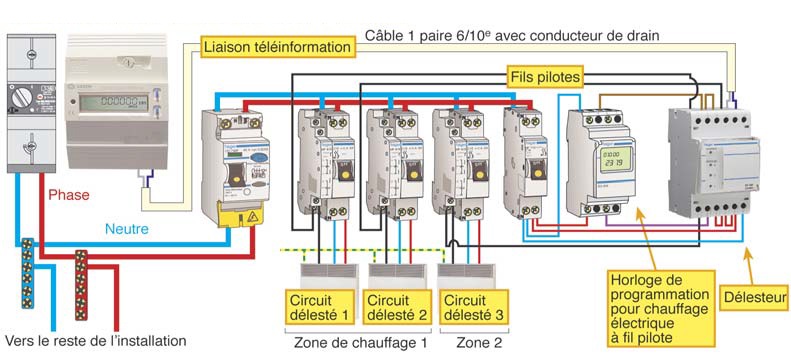
- Connect the load shedding relays. These are the switches that the délesteur uses to disconnect appliances. You'll typically have multiple relays, each controlling a different circuit (e.g., electric heating, water heater, charging station for your electric unicorn...).
- Test everything! Once you're sure everything is wired correctly, carefully turn the power back on and test the délesteur. Follow the manufacturer's testing procedures.
Pro Tip: Label everything! Before you start disconnecting wires, use masking tape and a marker to label each wire. This will save you a lot of headaches later. Trust me on this one. I learned this the hard way. (Don't ask.)
Choosing the Right Délesteur
Not all délesteurs are created equal. Consider these factors when choosing one:
- Your total power consumption. Choose a délesteur that can handle your maximum load.
- The number of circuits you want to control. Make sure the délesteur has enough relays for your needs.
- Advanced features. Some délesteurs offer features like remote monitoring and control via a smartphone app. Fancy!
Wiring a délesteur triphasé might seem daunting at first, but with the right information and a bit of care, it's a manageable project. And the payoff – avoiding power outages and saving money on your electricity bill – is definitely worth it. Now, if you'll excuse me, I'm off to buy more ice cream... just in case.